


You'll want to die cut it out of freezer paper. On my cameo I cut it out using the vellum setting, since it was kind of delicate. Be careful when you peal the excess away, it can tear easy. Once you have them cut, use your iron and iron them on to your shirt like so....


Then comes the fun part. Take your project outside, unless you like the smell of bleach in your house. I found this little spray bottle in the travel section at the grocery section. I filled it with straight bleach. Take your shirts and place a plastic grocery sack in between the the layers so the bleach doesn't bleed through. Take your bleach and gently spray the area you want to fade out. I like to just bleach around the shape, but you could have some fun with it. Be careful not to spray to much, or it gets absorbed into the freezer paper and then it bleeds though. It's fun to watch because the bleach works fast.


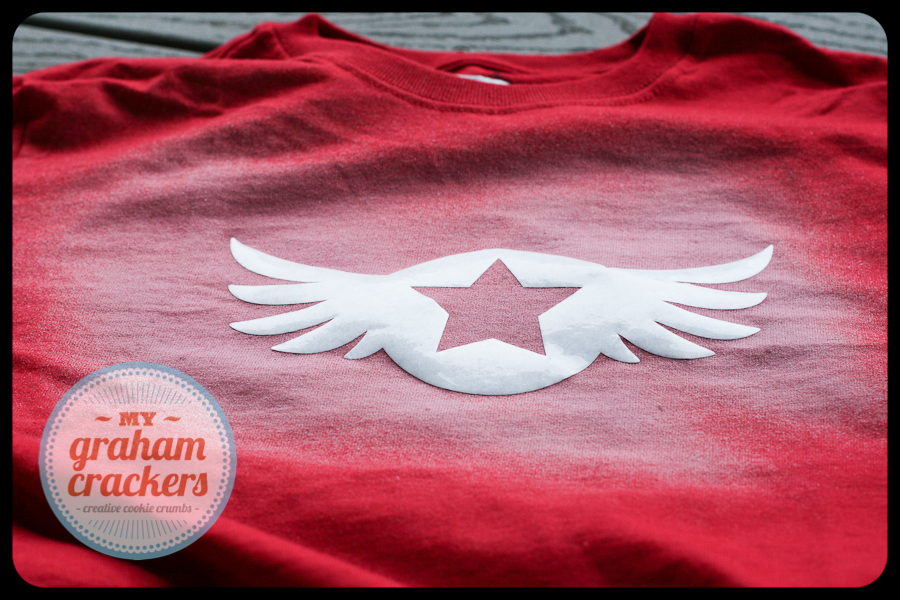


After about five minutes, the bleach will dry fast outside. Then carefully pull away the freezer paper.

Then toss them in to the dryer to make sure it gets dried completely. And there ya go, some fun shirts any kid (or grown-up) would be proud to wear!


All my files I used were from LoriWhitlock.com from these collections


Thank you SO much for this awesome easy tutorial! Something to do with my boys today! :)
ReplyDeleteVery cool idea! I bet we could do this for a fun project at our Family Reunion next week!! Thanks so much! I love such talented people who share!
ReplyDeleteLynnEl in Illinois
Thanks for sharing.
ReplyDeleteQuestion - where do you get freezer paper??
How clever = brilliant effect :) Thank you!
ReplyDeleteCorrina - you can get freezer paper by the wax paper and tin foil at walmart. it's like heavy parchment paper with a wax coating on one side. let me know if you cant find it!
ReplyDeleteThese shirts totally rock! How awesome!!
ReplyDeleteNatalie, what a great summer project! I love the idea and will have to try it with the grandchildren.
ReplyDeleteDue to their highly recognizable shape, and want for a better name, the word "T-shirt" was coined, and as the word found its place in the cultural lexicon, people across the world began to adopt the new and more comfortable alternative to the union shirt. Branded t shirts
ReplyDelete