


Here is the order of the hop..
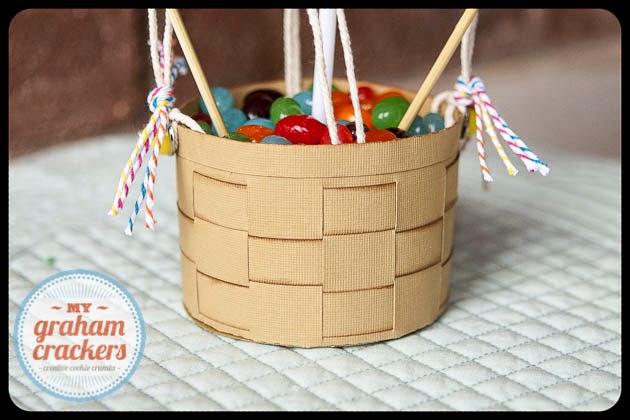
So today I am sharing a little project I made for some centerpieces for a school function I am helping with. The theme was "UP", so I decided to use Lori's Easter basket as a hot air balloon basket and make this darling center piece. I used this basket file found in Lori's store here, and cut it out of kraft colored card stock, inked the edges with brown ink before assembling it and assembled all but the handle. I then added the balloon on a stick and mounted it to the bottom of basket with a piece of foam. I laced string around the balloon and attached them to the bottom of the basket with glue dots, and added the bunting made from this card here. I used paper and embellishments from Lori's new Summer Bliss collection from Echo Park. And finally filled it with jelly beans to add weight and yumminess to it! I think it turned out super cute, and think they will look darling on any table!


Don't forget to stop in at Lori's blog and shop and use this code for a 30% off code from now until the 20th!
Thanks for stopping by!